Defining and implementing security levels in RMS Manager.
Defining and implementing security levels involves three basic steps:
- Defining the security level
- Assigning the security level to the cashier
- Restricting a non administrative cashier from changing security levels
Security levels can be defined down to the individual field level within the RMS manager. This will give you the ability to define specific fields as either non-viewable, non-editable or both.
NOTE: when defining a field as non-viewable, the software automatically defines the field in question as non-editable.
Defining Security Levels:
There are 30 security levels available within RMS. Each level can be defined with as many or as few rules as you wish. The default level, level 0, has no restrictions defined. The security level number has no bearing on the defined restrictions, for example, level 3 might have more restrictions than level 28.
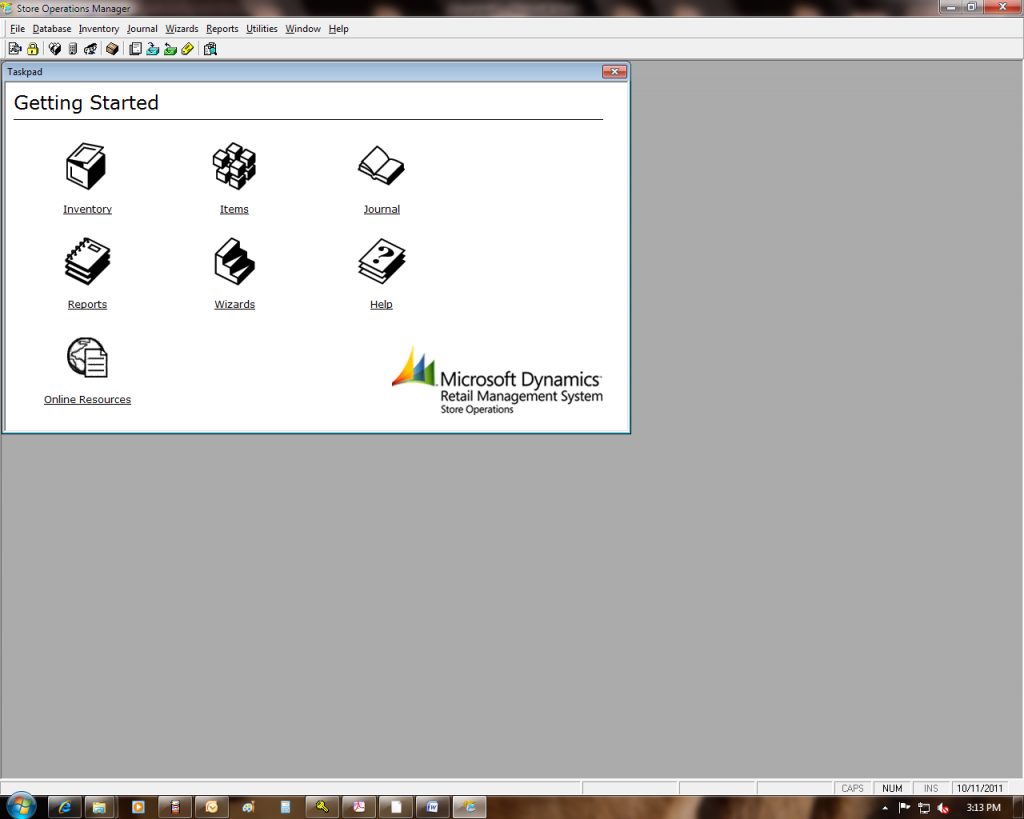
To define a security level, launch the RMS Manager and log in as a cashier with administrative rights. You will see the following screen:
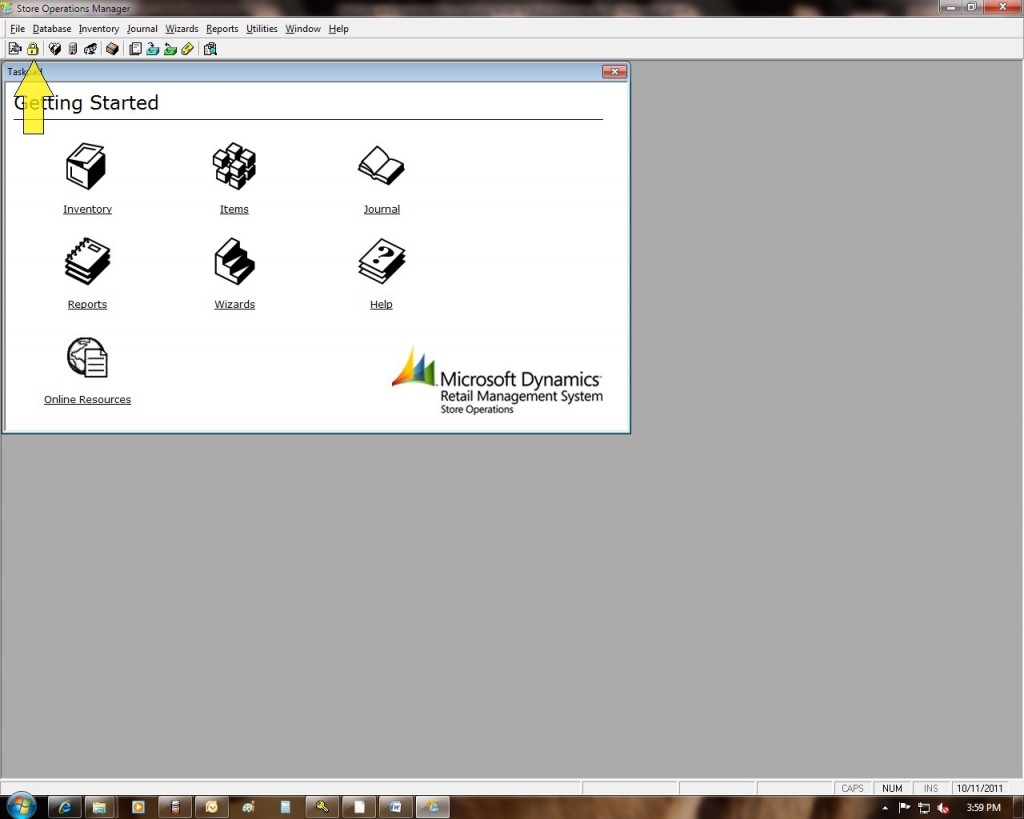
Click on the small “padlock” icon in the upper left corner of this screen:
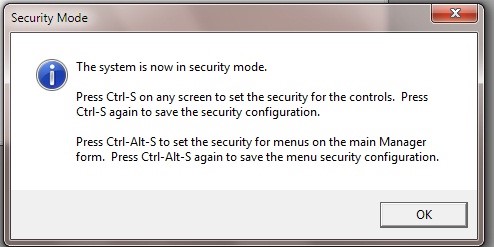
When you click on the “padlock” icon, the following message is displayed:
This message is for information purposes. It is telling you that if you want to assign a specific field to a security level, navigate to the screen that contains the field as press the Ctrl + S to enable security editing, and then press CTRL + S to save your changes. If you wish to assign security settings to entire menu functions, restricting access to reporting functions, press CTRL + ALT + S to enable security editing and then CTRL + ALT + S to save your changes.
For this example, we’re going to focus on restricting the editing of a specific field, the credit limit on the customer information.
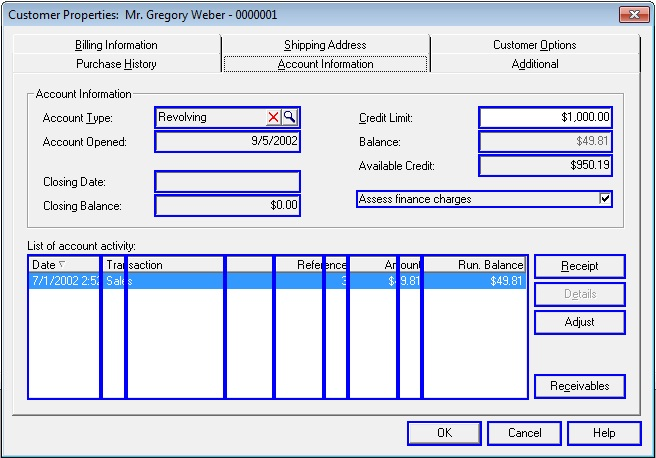
After acknowledging the message shown above, click on “Database”, then click on “Customers”. The customer list is now displayed. Select ANY customer and click “Properties”. Once you have displayed the properties, click on the “Account Information” tab. We have now navigated to the screen that contains the field we are going to assign security to. Using the instructions outlined above, press the CTRL + S key combination. You will now see the following screen:
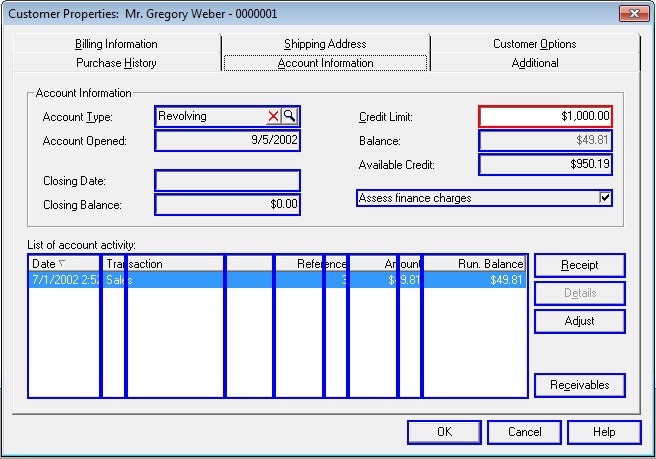
Each field or button on this screen that can have security assigned to it is outlined in blue. Using our desire to restrict editing of the Credit Limit, point the mouse at the Credit Limit field and single left click. You will see the following screen:
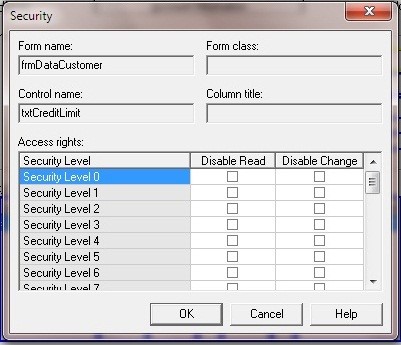
At this point, you can select which security level you wish to add this restriction to.
- Disable Read – This will totally blank the field so that the cashier can neither see or change the information
- Disable Change – This will display the information in the field, but not allow any changes.
For the sake of this example, place a check in the “Disable Change” option on the Security Level 5 line. When you click OK, the following screen is displayed:
Note that after you define a security level for a specific field, the color of the border changes from blue to red. Once you have completed defining security for the desired fields, press CTRL + S to save your changes. REMEMBER, I have used security level 5 in this example, you can chose to define any security level from 1 to 30. Now exit the customer properties and then exit the list of customers.
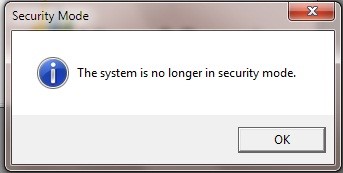
Click on the “padlock” icon again, and you will be informed that you are leaving security mode:
Assigning a security level to a cashier:
Now that you have defined the behavior of a security level, you must assign this security level to the cashiers that will be affected by it. To do this, you must edit the properties of each cashier.
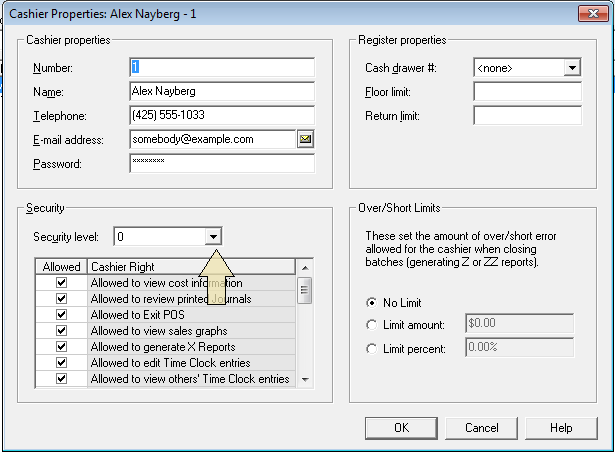
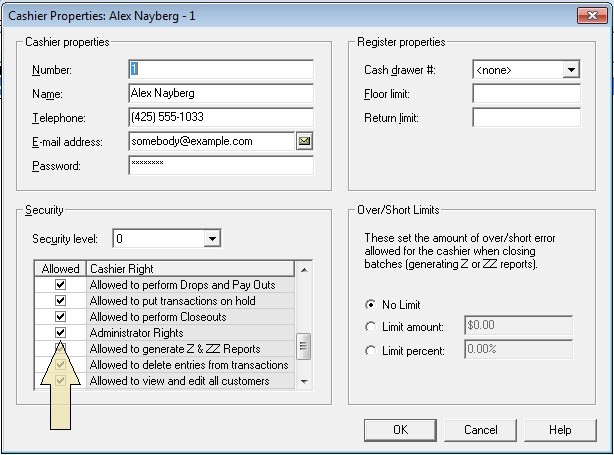
Assuming that you are still logged in as an administrative level cashier, click on “Database”, then click on “Cashiers”. Highlight the cashier you wish to edit and click “Properties”. You will see the following screen:
Click on the drop down box next to Security level, select the desired security level, using our example, we would select security level 5.
Restricting a non administrative cashier from changing security levels
After selecting the security level, find the option in the list box below called “Administrator Rights”:
Un-check the Administrator Rights option. This will ensure that after you have changed the security level on the cahsier, the cashier CAN NOT change their own security level. Now click OK to save your changes. Repeat the above steps on each cashier that you wish to apply this security level to.
NOTE: restricting Administrator Rights on a cashier only removes the ability to add, edit or delete a cashier.
Changes made to a cashier will not go into effect until the next time the cashier logs into the software.
