Defining Departments and Categories in RMS Manager
Microsoft RMS gives the user the ability to define an unlimited number of Departments and Categories, allowing logical grouping of items. Many reports, as well as the daily Z-Report, report sales information based on department breakdowns. This information can be used to determine fast or slow selling items. Shelf space in any store is at a premium, this information will help you decide what items get the most shelf space.
Departments allow you to group like, broad range items together. For example, you might define Departments for “Cough and Cold”, “Health and Beauty”, “Vitamins”, etc.
Categories allow you to segregate items that are grouped under a specific department into smaller, sub-groups called Categories. For example, you might define “Cough Syrup”, “Cold Remedies”, etc. as categories under the “Cough and Cold” Department.
Departments and/or Categories MUST be defined before either can be assigned to items in your database. The following steps will outline how to define both Departments and Categories.
Defining a Department:
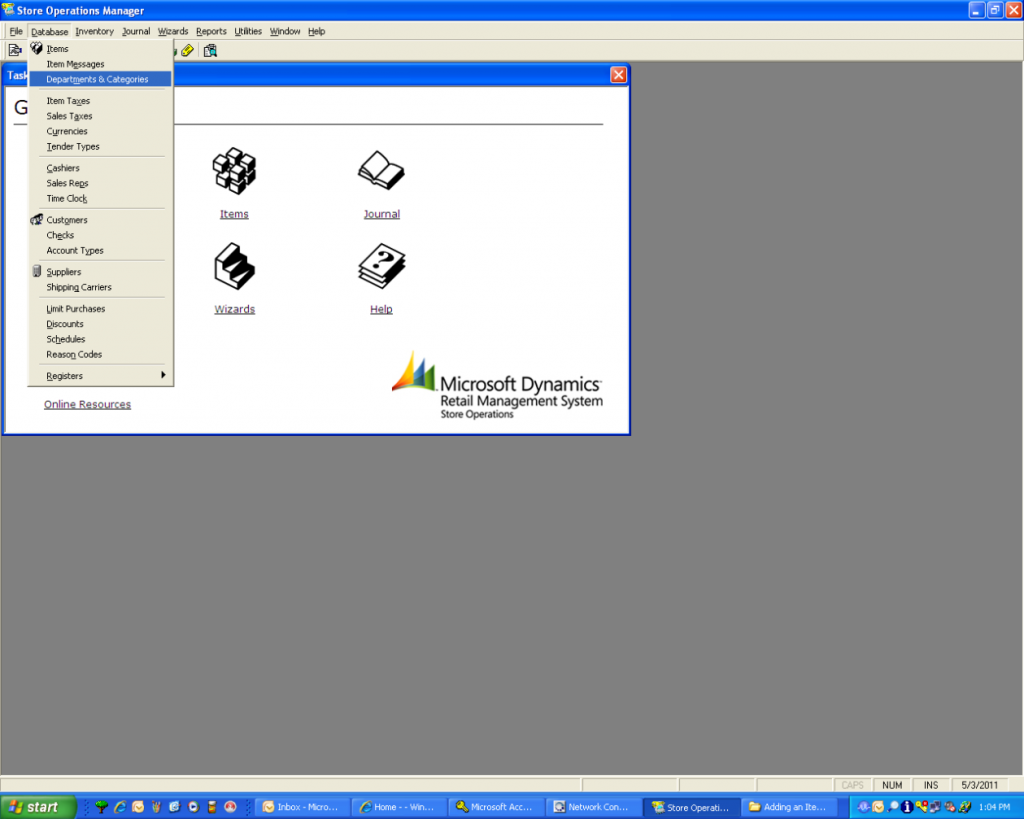
You must first open the RMS Manager program. Once you have logged in, click on “database” on the menu bar. The following screen will be displayed:
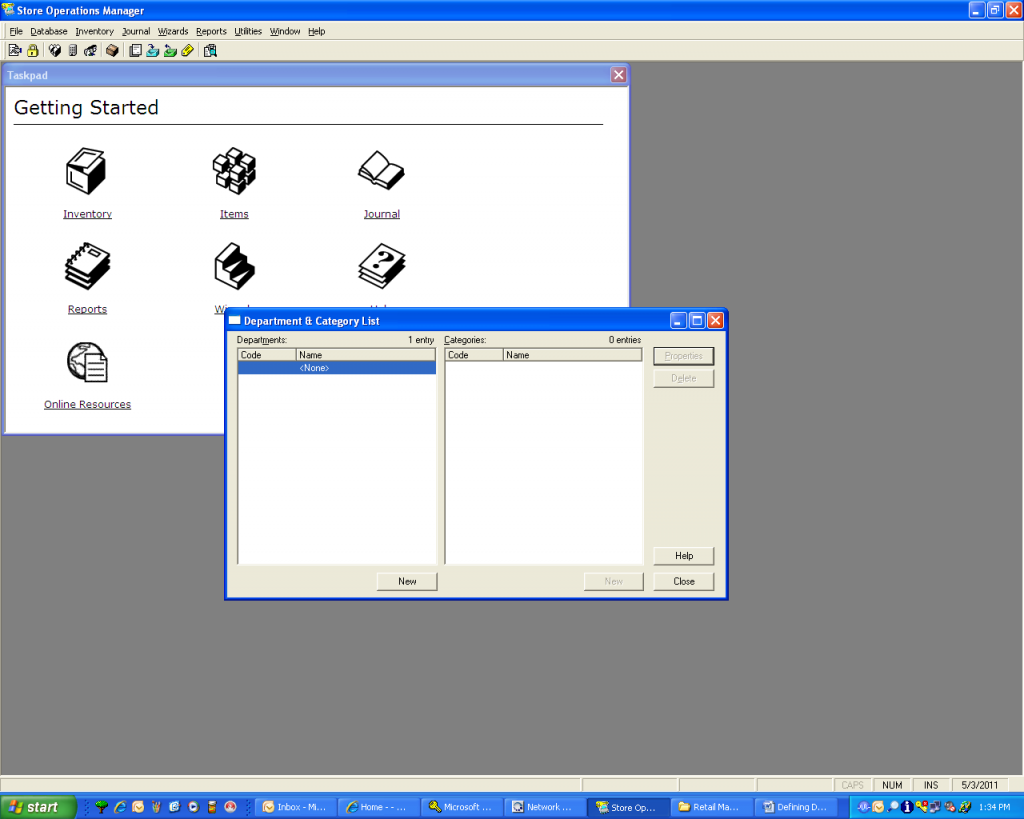
Highlight “Departments and Categories” with your mouse left click. The following screen will be displayed:
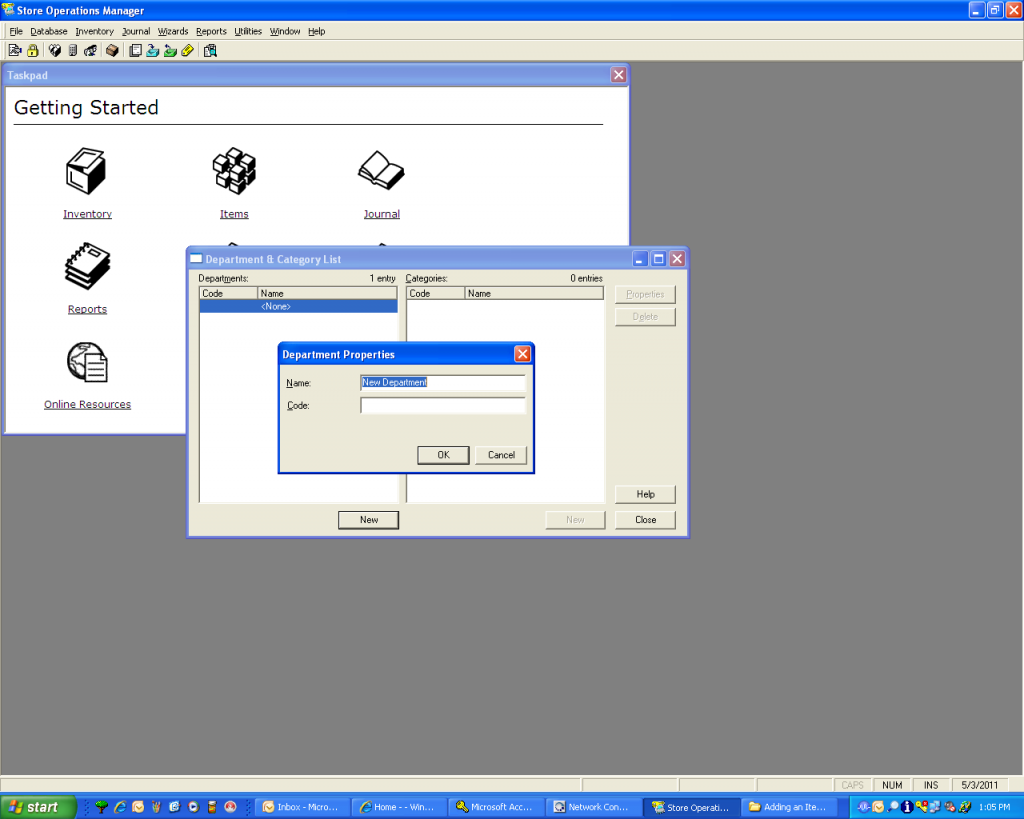
This screen allows the creation or editing of both Departments and Categories. The screen is split into a left hand pane, and a right hand pane. The left hand pane is used for Departments, so we will focus on it. Notice that there is a button labeled “New” under the left hand pane. You must click this button to add a new Department. Upon clicking the “New” button, the following screen is displayed:
You are now prompted to define a Department Name and a Department Code. You are free to define what you wish in each field. NOTE: Typically the code is just a short hand version of the Department Name. For example, if your Department Name is “Cough and Cold”, the Code might be “CandC”
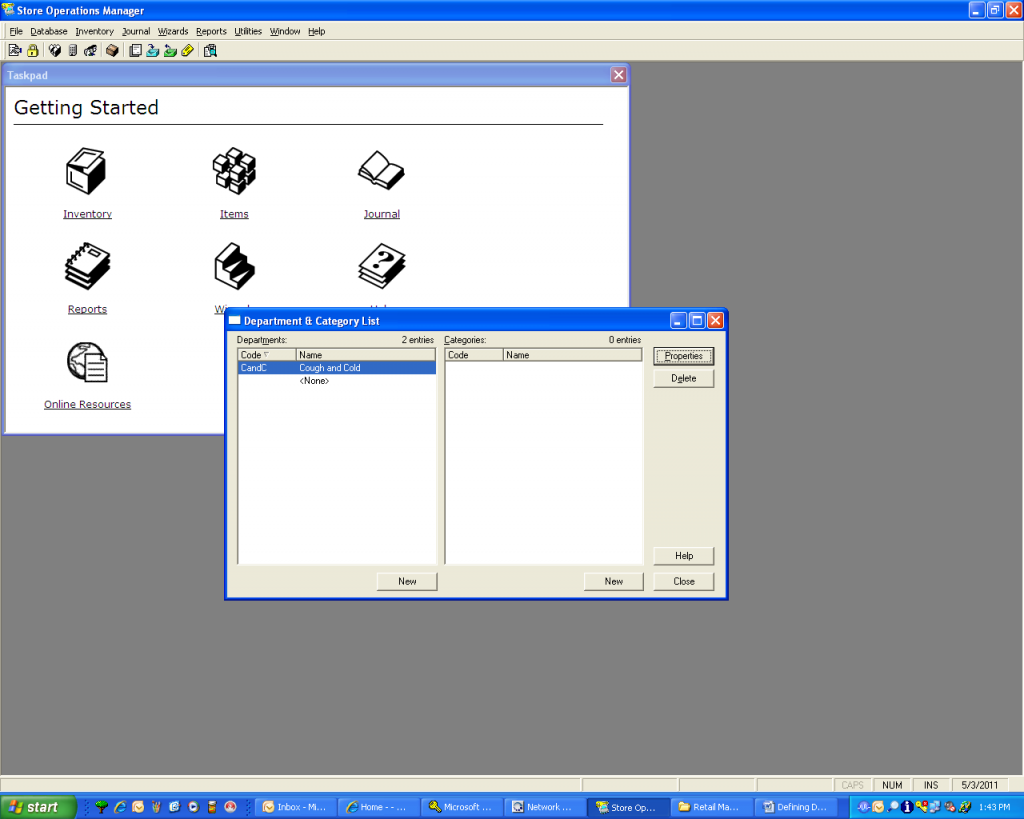
Once you have defined the Department, click the “OK” button to save the department. Your screen will now look like the following:
You can now add additional departments using the method defined above. If you make an error, you may also simple highlight the Department in question and click the “Properties” button. This allows you to edit the Department Name and/or Department Code.
After you have defined the Department(s), you can focus on defining Categories.
Defining a Category:
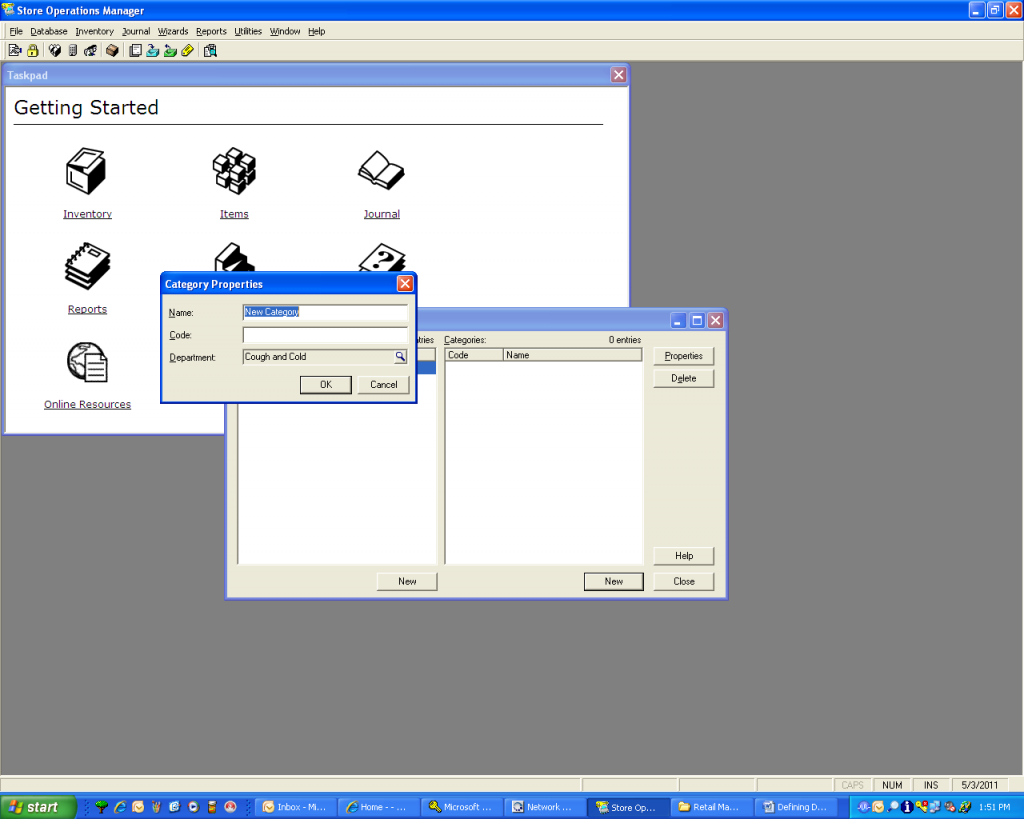
Categories are defined using the right hand pane of the screen above. To define a Category, click the “New” button under the right hand pane. You will see the following screen:
Like the Departments, you are prompted for a Category Name and a Category Code. You are also prompted for the Department this Category belongs to. If you click on the small magnifying glass icon to the right of the Department field, you will be presented with a drop down list of all defined Departments. You simply select the Department that this new Category belongs under.
NOTE: Remember, you are allowed as many Departments as you wish, with as many Categories as you wish under each specific Department.
If you make an error when adding the Category, you can highlight the Category in question and click the “Properties” button. This will allow you to edit the Category information.
NOTE: Highlighting a Department in the left hand pane will automatically display the Categories that are attached to the highlighted Department in the right hand (Categories) pane.
