Adding a new Item to your RMS database
Your RMS Point of Sale software depends on the accuracy of the data defined in the Item file. If an item does not exist in the Item file, it simply can’t be sold at the register. It is very important to define and maintain your item file. This document will outline Adding a new item to the item file.
NOTE: The steps taken within the RMS Manager program are the same when adding or editing and existing item.
Adding an Item:
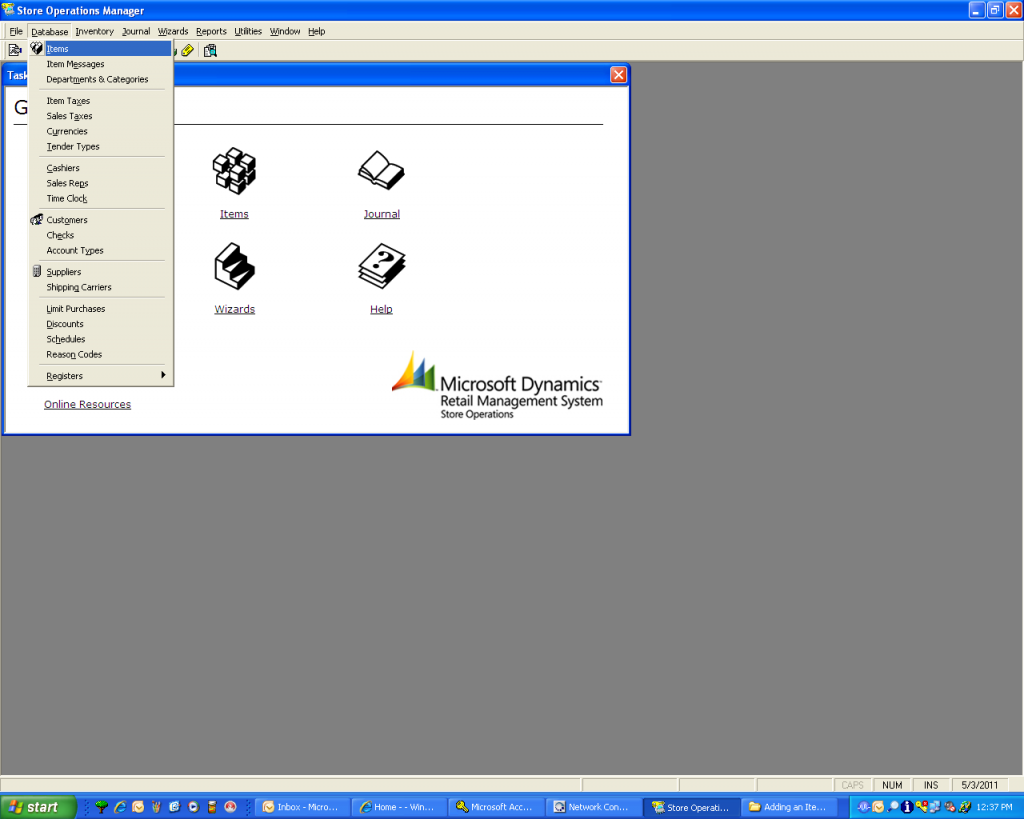
First launch the RMS Manager program and log in. After you have logged in, click “database” on the menu. The following screen will be displayed:
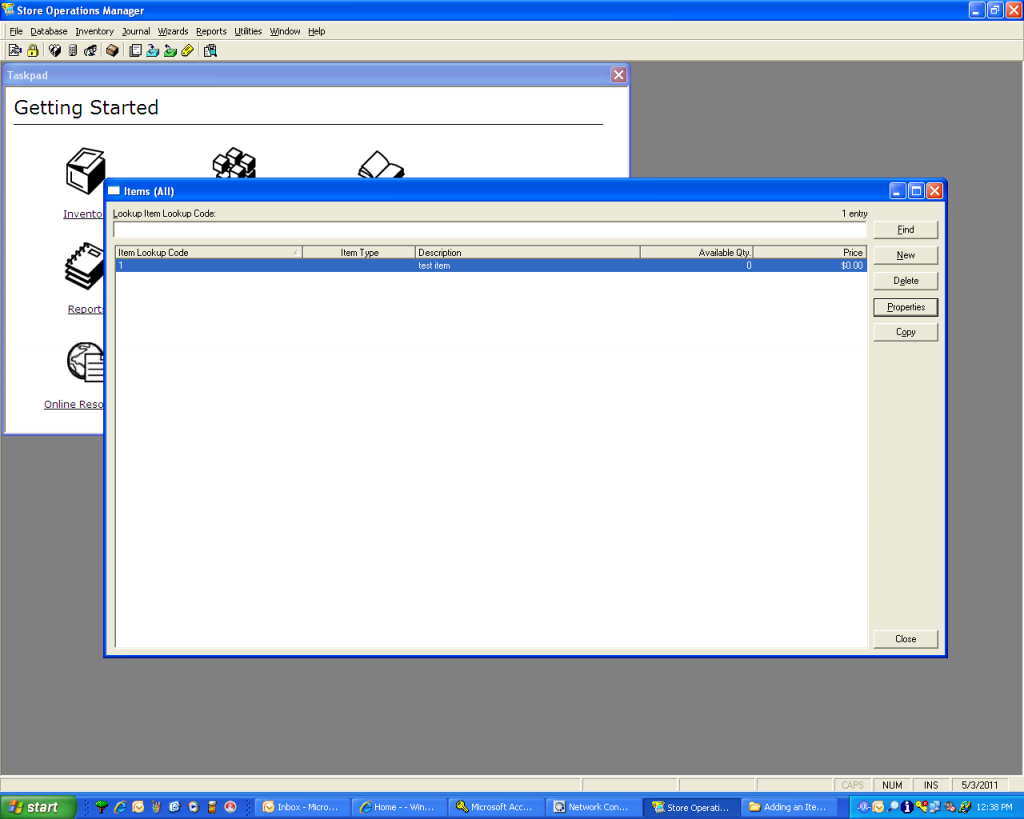
Highlight “Items” with your mouse and left click. The following screen is displayed:
You will now see a list of the Items defined in the Item file. According to the screen above, there is one Item in the Item file. That item is called “New Item” and the lookup code is 1.
NOTE: The Item Lookup Code is also referred to as the SKU number. When adding items into the Item file, you will want to enter the SKU number from the item itself into the Item Lookup Code field. We will look at SKU numbers more closely as we work through this document.
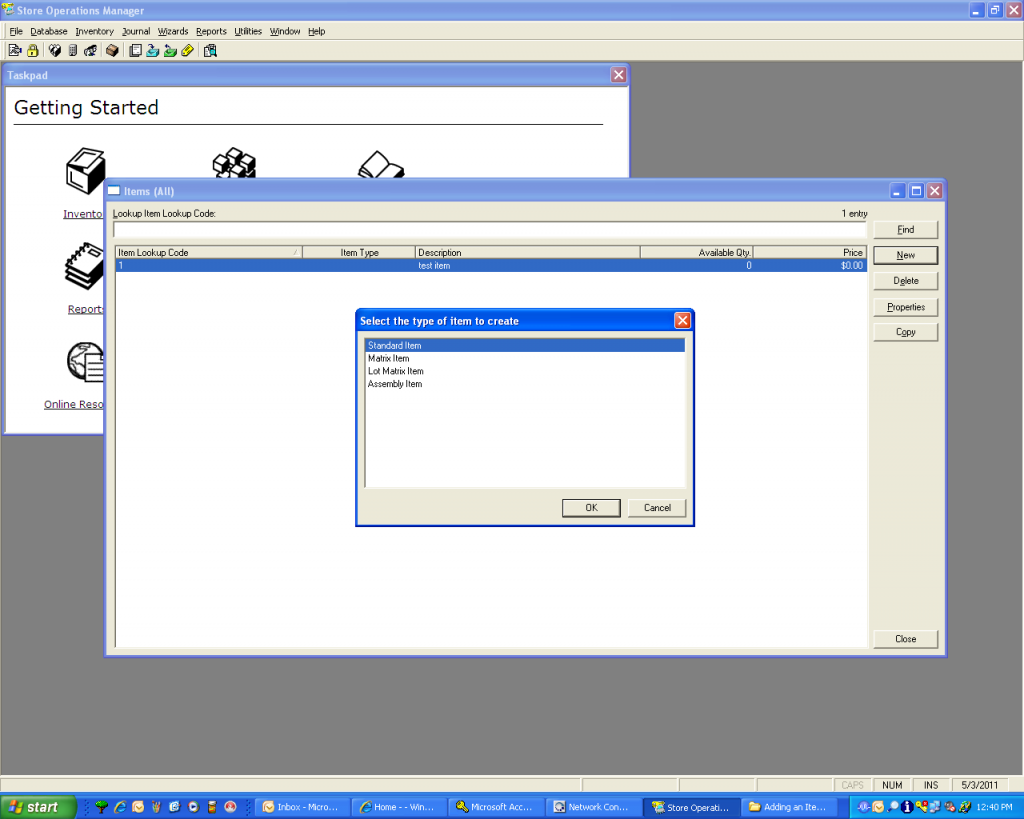
To add a new Item, click the button labeled “New”. The following screen will be displayed:
You are now prompted to define what type of item you will be adding. For the sake as simplicity, highlight “Standard Item” and click “OK”
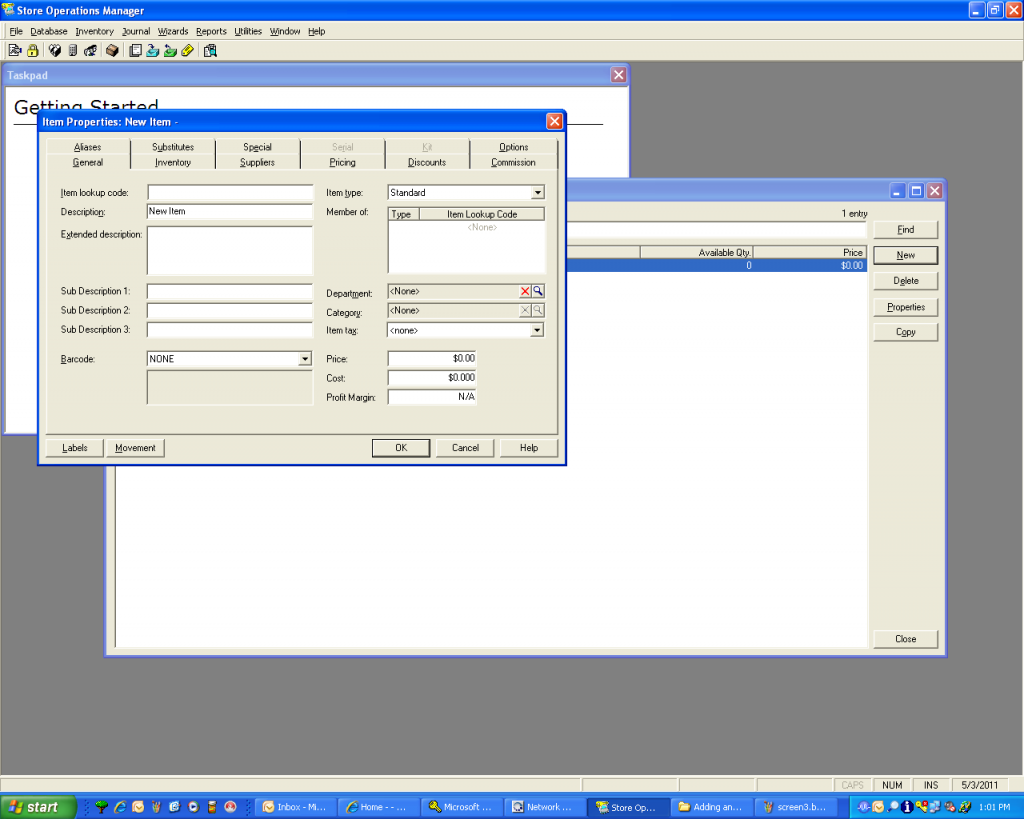
You will now see the following screen:
We will discuss the absolute required elements to define an Item. You can access the application help for information on all of the fields defined on the Item.
The item screen itself is broken down into a number of “tabbed” screens. The tabs run along the top of the Item screen and can be accessed by clicking the tab.
We are going to focus on the:
- General Tab
- Inventory Tab
- Supplier Tab
- Pricing Tab
- Options Tab
Looking at the General Tab, we see the following fields:
- Item Lookup Code – This field is used to store the SKU or Barcode number. There is a formatting rule that must be followed why entering a SKU number. If the SKU number is a traditional “long” (12 digit) SKU number, the ENTIRE number must be entered in this field. That includes the “small” leading and trailing number. If the SKU number is of the “Short” variety (found on candy bars, cigarettes, etc.), the SKU MUST be entered WITHOUT the leading and trailing “small” digits. If the item you are entering does not have a SKU, you can make up a lookup code that will be used at the register to look up this item for sale.
- Description – This will be the description of the item that will appear on the sales receipt as well as the detail lines of the in house accounts receivable statements.
- Extended Description – This is additional description room and is not typically used
- Sub Description 1 – Not typically used
- Sub Description 2 – Not typically used
- Sub Description 3 – Not typically used
- Barcode – This field allows you to define the type of barcode label that you would like to generate if you are printing your own barcode labels. This field is not used if the item you are adding has a barcode from the manufacturer
- Item Type – Define the type as Standard
- Member of – Not used unless the item type is NOT standard
- Department – Click the small magnifying glass icon to display a list of departments defined in your system. Select the appropriate department for this item. If the appropriate department does not exist, the department will have to be defined BEFORE it can be attached to the item
- Category – Click the small magnifying glass icon to display a list of categories defined in your system for the department selected above. Select the appropriate category for this item. If the appropriate category does not exist, the category will have to be defined BEFORE it can be attached to the item
- Item Tax – If this is a taxable item, click the small down arrow in this field and select sales take. IF this field is left blank, sales tax will NOT be calculated on this item at the time of sale.
- Price – Enter the retail price of the item
- Cost – Enter the cost of the item
- Profit Margin – The profit margin calculates automatically based on the price and cost entered
Looking at the Inventory Tab, we see the following fields:
NOTE: The fields on the Inventory Tab are NOT required when adding a new item, but it is important to understand what these fields represent. You can edit an existing item at any time to define the inventory information.
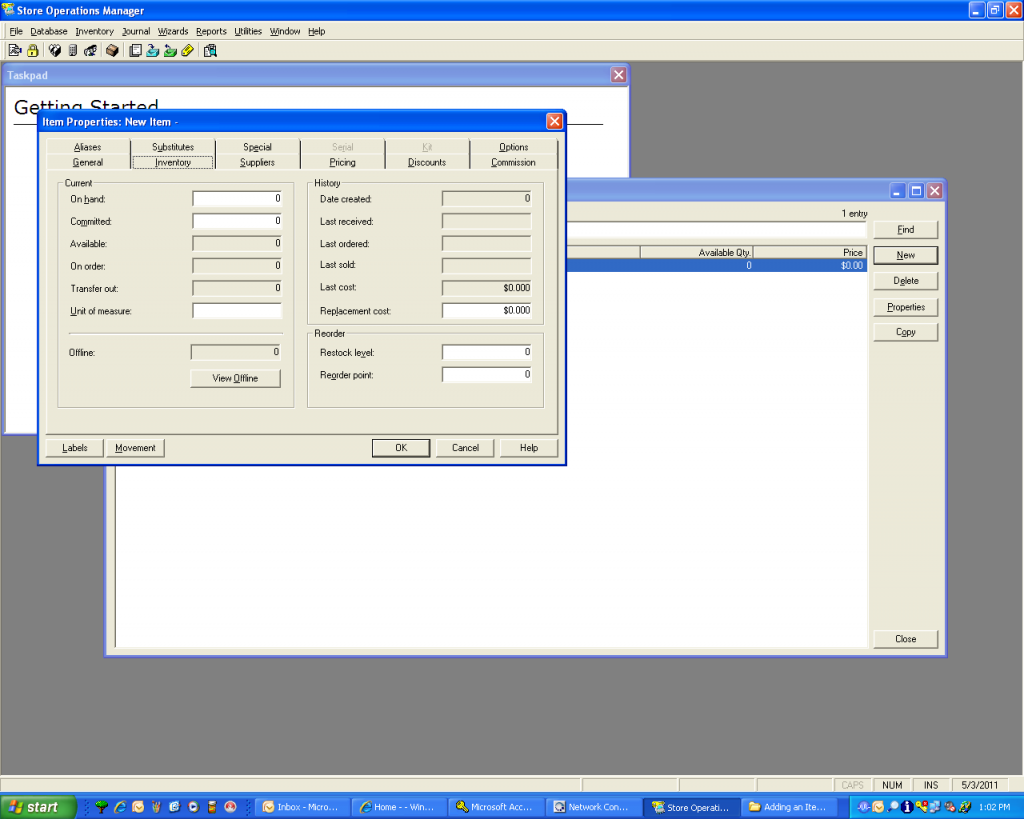
- On-Hand – This value reflects how many of this item you have in inventory
- Committed – This value reflects how many of this item has been committed due to back orders
- Unit or measure – This is a free hand unit of measure field and is not typically used
- Replacement cost – This value reflect the replacement cost of a single unit of this item
- Restock level – This value is used in conjunction with perpetual inventory. This value reflects the amount that you wish to keep in stock
- Reorder point – This value is used in conjunction with perpetual inventory. This value reflects the on-hand quantity point that triggers a re-order event. For example: if your restock level is set at 20, and your reorder point is set at 5, and you make a sale that brings the on-hand quantity down to 4, an order event will be triggered and the quantity to order will be 16 (to bring your on-hand quantity back up to the defined restock level)
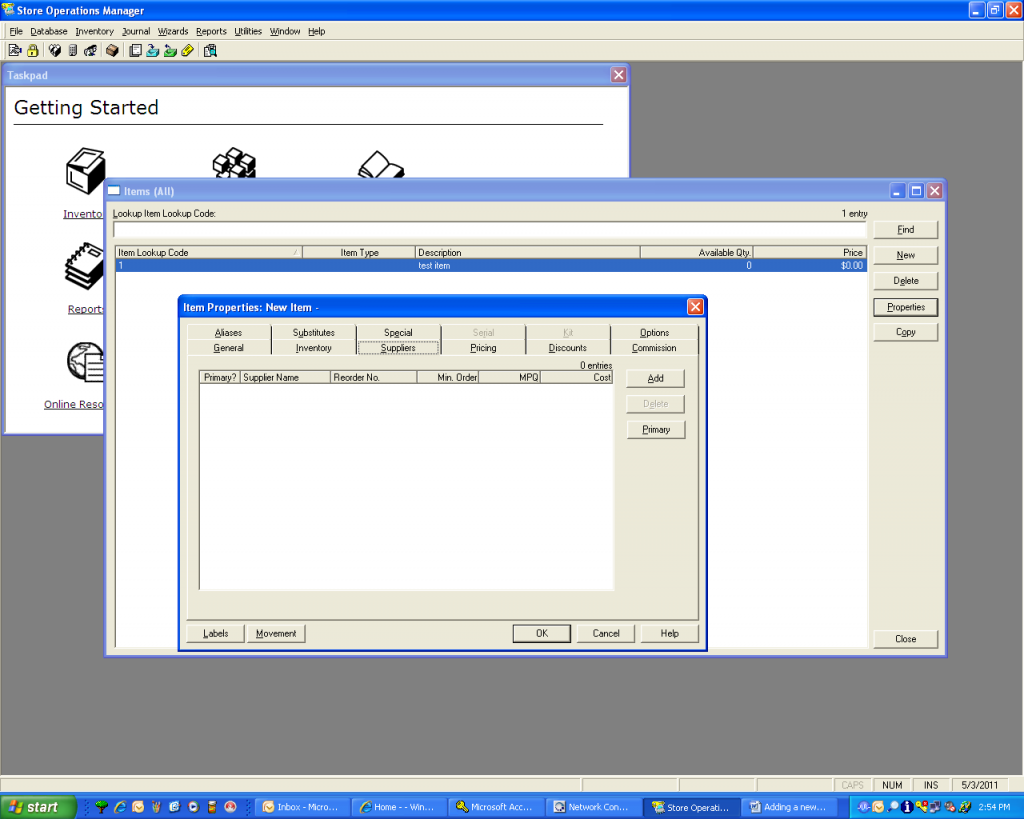
Looking at the Supplier Tab, we see the following fields:
NOTE: The fields on the Supplier Tab are NOT required when adding a new item, but it is important to understand what these fields represent. You can edit an existing item at any time to define the supplier information.
Suppliers MUST be added within the database BEFORE they can be attached to an item. To attach an existing supplier to an item, click the “Add” button. You will be presented with a list of suppliers that are defined in the system. Select the appropriate supplier.
Once the supplier is selected, you can further define the following information:
- Primary? – This is a Y/N question. Answer Y if the supplier listed is the main supplier of this item
- Supplier Name – This field will fill in after you have selected the appropriate supplier
- Reorder No. – This is the reorder number for this item from this supplier
- Min Order – This allows you to define a minimum order quantity for this item
- MPQ – This is the Master Pack Quantity
- Cost – This is the cost of the item as defined from the supplier.
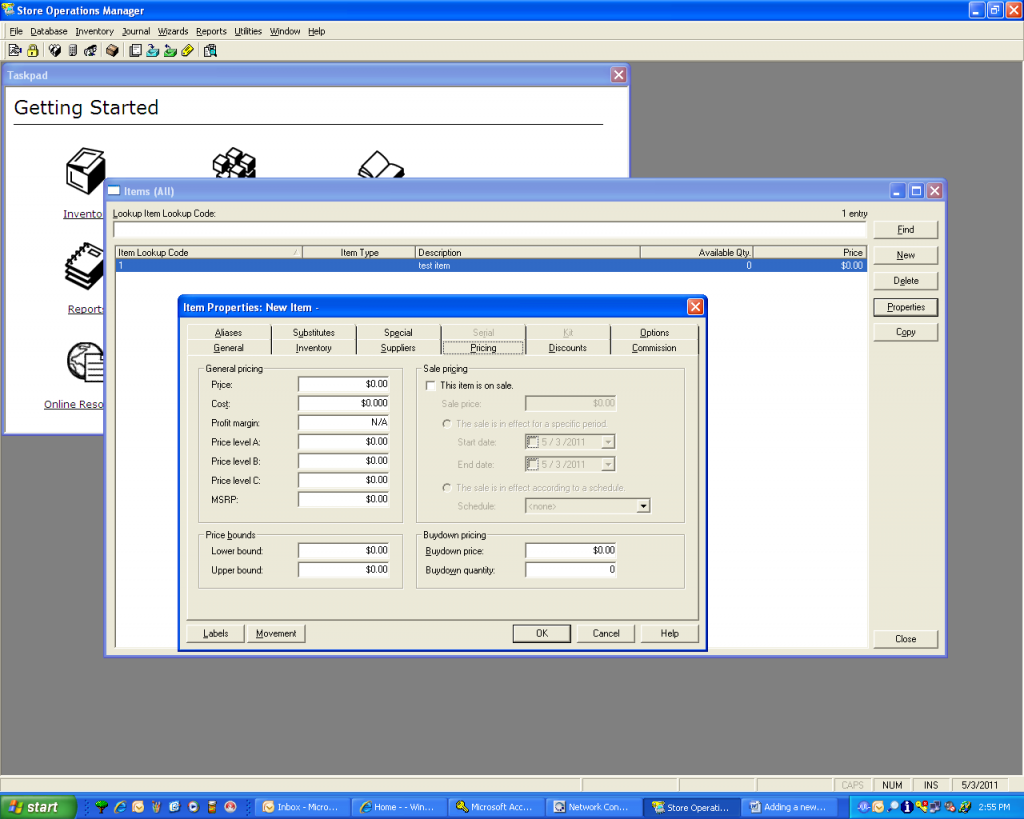
Looking at the Pricing Tab, we see the following fields:
NOTE: The fields on the Pricing Tab are NOT required when adding a new item, but it is important to understand what these fields represent. You can edit an existing item at any time to define the pricing information.
- Price – This is the retail price of this item
- Cost – This is the cost of this item
- Profit Margin – The profit margin is calculated based on the retail price and cost
- Price level A – This represents a special price for customers that are defined in this price level
- Price level B – This represents a special price for customers that are defined in this price level
- Price level C – This represents a special price for customers that are defined in this price level
- MSRP – This represents Manufacturer’s Suggested Retail Price and is not typically used in the pharmacy environment
- Lower Bound – This represents the lower bound price of this item. For example, if the price is over-ridden at the time of sale, this field defines the lowest price that this item can be sold for.
- Upper Bound – This represents the upper bound price of this item. For example, if the price is over-ridden at the time of sale, this field defines the highest price that this item can be sold for.
- Buydown price – This represents the price to charge for each qualifying buydown item. For example, assume the buydown price is $0.50, the buydown quantity is 5, and the regular item price is $1.00. If a customer purchased two of the items, the amount due would be $1.00 (2 x $0.50). The next three purchases would also be charged at $0.50 each. Once the buydown quantity has been reached, every subsequent purchase is at the regular price. Therefore, in this example, the sixth and subsequent items would be sold at $1.00 each.
- Buydown quantity -This represents the item quantity that is available at the buydown price. If the line item quantity is greater than the remaining buydown quantity, the entire line item quantity will be priced at the buydown price. Subsequent quantities will be priced at the normal price
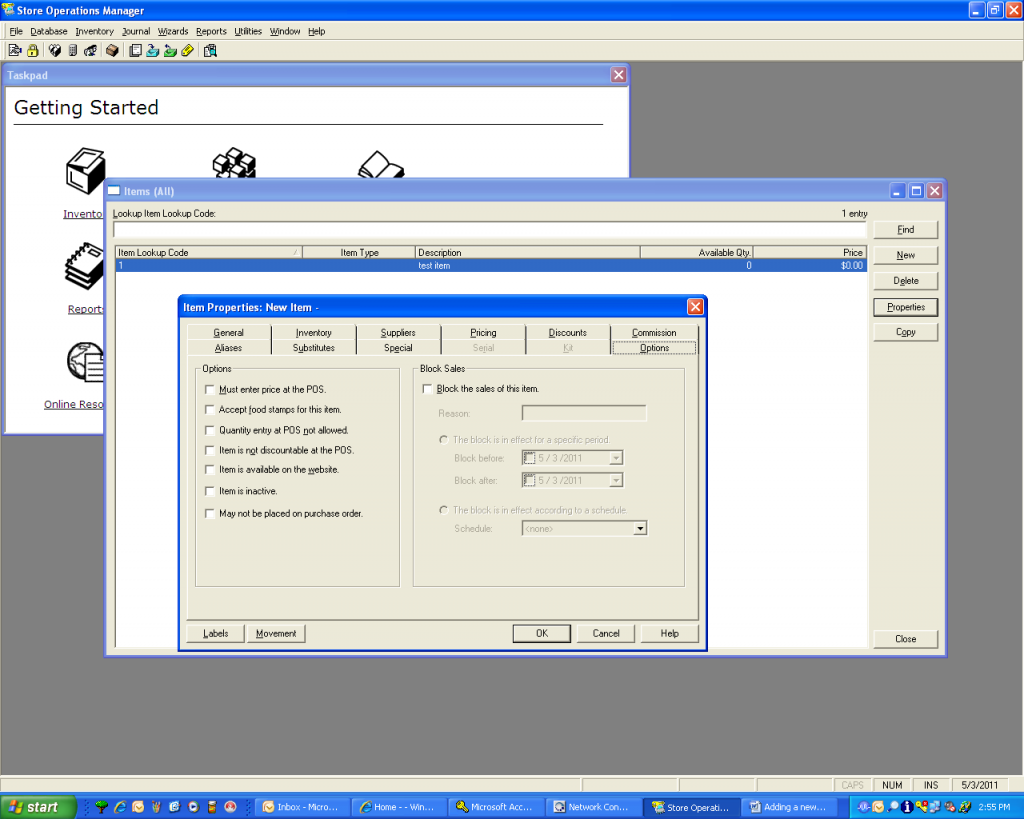
Looking at the Options Tab, we see the following fields:
NOTE: Most of the fields on the Options Tab are NOT required when adding a new item, but it is important to understand what these fields represent. You can edit an existing item at any time to define the option information.
- Must enter price at the POS – If checked, when this item is sold at the POS, the cashier will be prompted to enter the price
- Accept food stamps for this item – If checked, this item can be tendered as a food stamp type of sale
- Quantity entry at POS not allowed – If checked, the cashier will NOT be able to scan this item one time and then change the quantity to something greater than 1. This forces the cashier to scan each of this item being purchased.
- Item is not discountable at the POS – If checked, the system will not allow the cashier to define a discount for this item
- Item is available on the website – If checked, indicates to the cashier that this item is available on the website. Not used
- Item is inactive – If checked, this item is flagged as In-Active and can’t be sold at the POS
- May not be placed on purchase order – If checked, this item can’t be placed on a purchase order. Not used
- Block the sales of this item – If checked, the sales of this item can be blocked for the time defined.
After you have entered the necessary information on your new item, return to the General tab and click the “OK” button. Your new item will be saved and will now show up in your list of available items.
